Using Notebooks
From the Hub, you can click on a Notebook (a files with the suffix .ipynb) or create a new one with the "New" button. You need to pick a computing language (Python, Julia or R) when you create a new Notebook; for now, just choose Python 3.
The Notebook will look something like this.
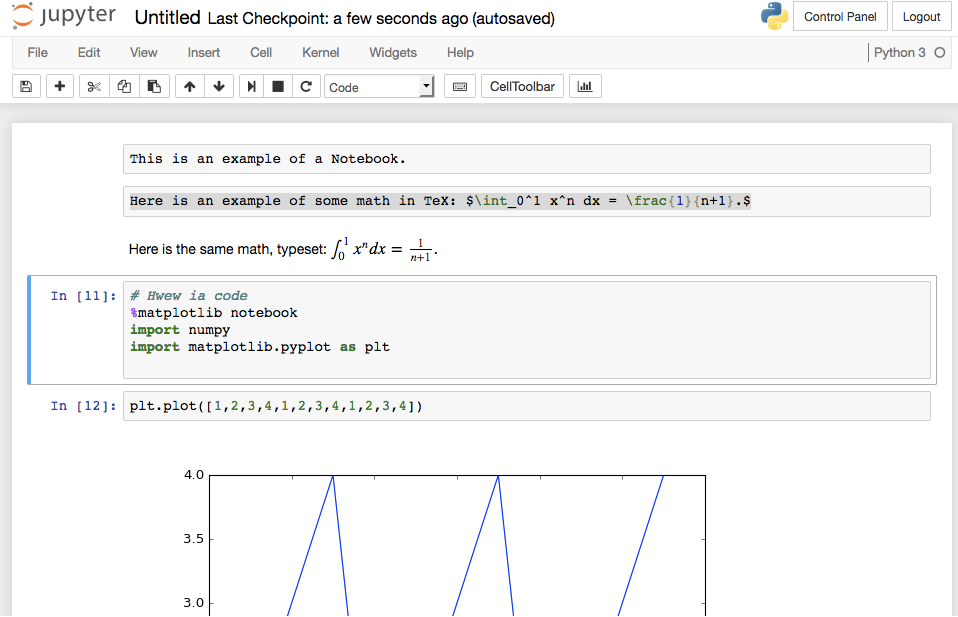
At the top is the name of the notebook (in this case, "Untitled"). You can click on that name and edit it to whatever you like.
Just under the title is the menu bar, which allows you to do many things with the Notebook, including saving it, downloading it to your own computer, editing it, inserting new cells, and so on.
There is also an icon bar of menu short cuts. All of them are pretty obvious.
Below the menu controls is the Notebook content, which consists of a sequence of cells. Each cell can contain Markdown text or computer code. You select which kind of content for that cell from the little icon in the icon bar a the top.
In the example illustrated here, the first cell is just text. It says "This is an example of a Notebook." The second cell is Markdown text, including a math formula in LaTeX format. It starts "Here is an example of some math..."
The third cell shows the math formula as a real math formula, with an integral sign and all. The math is just typed in (like in the second cell), and then you hit "shift-return" on the keyboard to typeset the math.
The final few cells show some code, that loads in some plotting tools and makes a simple plot.